Today we are ecstatic to announce that we have started shipping out our pi-topCEED. To get you started we've prepared a trilogy of projects. Let's start the plug & play!
Components needed:
- LED x 1
- 100Ω Resistor x 1
- Wire x 1
- pi-topPROTO board x 1
Background: LEDs are a particular type of diode that convert electrical energy into light. In fact, LED stands for "Light Emitting Diode". They are all around us in daily life: in our phones, our cars and even our homes. It is highly likely that when something electrical lights up - there's an LED behind it. For more on LEDs check out this link here.
Step 1: In this tutorial you will learn to make your first LED circuit on the pi-topPROTO board, that can be found by following the link here.
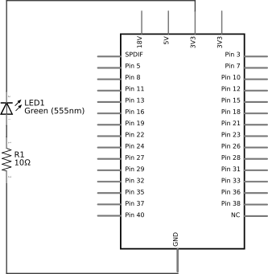
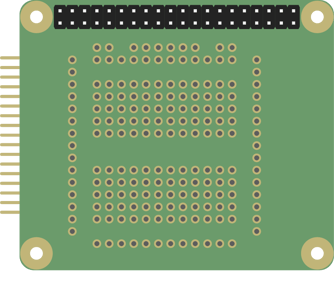
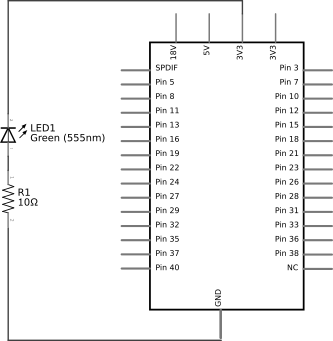
Step 2: This image below shows you diagram of the LED circuit and an empty pi-topPROTO board onto which the projects can be built!


Step 3:
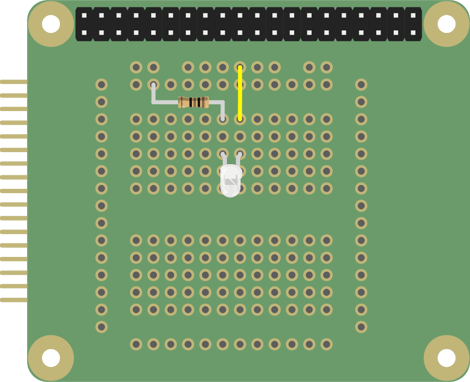
- Below is an image of how the circuit should be connected, with an LED, 100Ω resistor and a wire to complete the circuit.
- The resistor is connected to ground and the negative terminal of the LED; a wire is connected to the 3V3 power source and the positive terminal of the LED. The longer of the two LED terminals is the positive terminal.

Step 4: Once the circuit has been soldered in place (please follow the link here or watch it belwo, to take you to our video showing you how to solder onto a pi-topPROTO board,) all you have to do is slide the pi-topPROTO board into the HUB!
We would warn you to be very careful with soldering and take the necessary precautions! :)
If you are interested in learning more about LEDS please follow the link here. Or, continue with the next Tutorial: CEEDUniverse Compass Tutorial.
https://www.youtube.com/watch?v=HTW3c-XNWyU
